Posts mit dem Label Programming werden angezeigt. Alle Posts anzeigen

Freitag, 24. Februar 2017

Don't be this kind of Developer!

Ever tried this? Planning out your entire gamedev project - at once. In every little detail.
I tried doing so - with Hack n Plan. I laid out the entire array of features as detailed as I could. It was nice in that it helped me how large it will become. However: It did not work out at all for me. After a while, I found myself overwhelmed by the volume of tasks I've set up and ended up demotivated enough to never touch that Hack n Plan project again.User error doesn't make the tool bad, however.


So what was the problem here?


I cannot focus because of too much clutter! And I'm clutter-minded already:

It starts with detailed and seemingly endless todo-lists. If I don't clean up and these lists grow to large, this is what happens in my head:

Out of 1000 important tasks let's pick the least important one because fuck progress!
There is SO MUCH to do!
Where the hell am I going to even start, oh my god, oh my god
Before I work this long list, let's take a look at this game I haven't played in forever!


Developer meltdowns are BAD.


READ: Ways to boost your productivity


What one must do is to trick oneself into working and getting comfortable with what one is doing.


That means, getting rid of all things that's preventing you from doing it: tuning down on the "lazyness threshold"; fostering a habit that comfortably enables you to get shit done. Like, going to the gym that just happens to be on your way home when calling it a day.

Something similar can be done using this 5-step-iterative approach:
  1. Evaluate
  2. Structure
  3. Implement
  4. Take Notes
  5. Repeat

How does it work?


  1. Evaluate the current state of your project: find out what bugs exist and what still needs work.

  2. Structure the current iteration.

    Create a todo list consisting roughly of:

    • 10% new features
    • 30% extending existing features/improving user experience
    • 60% bug fixes
    If you have a list from step 5 in a previous iteration, use that list as basis for bug fixes and extensions.
    New features should be a lower priority; if they are "spontaneous features": Get rid of them. NOW. KILL IT WITH FIRE.)
    Ensure the extensions/features/bugfixes are meaningful and leading you to your goal; which is finishing your game in time - NOT playing with your game mechanics until it's perfect which it will never be.


  3. Implement the todo list.

    Do it blindly. Do not think much. Do Shia a favor and JUST DO IT.


  4. While implementing, take notes for the next iteration:

    • Bugs
    • Issues
    • UX improvements
    • Code refactoring
    Avoid adding new features to this list AT ALL COSTS


  5. Repeat.

How can you implement that into your work flow?

I've started to treat the changelog as my todo list when I am in step 2 (Structure). I will take notes there to solve problems or figure out how to implement or improve features. When I'm done implementing a feature, I remove the implementation notes and reword the feature for normal folk (gamers) to read and understand.

For step 3 and 4, taking notes while implementing, I have started to use a separate text file for bugs and issues I encounter in this iteration. I keep this one seperate from ideas for features. The file with ideas is the most spontaneous one and consequently its priority should be very low to zero.
So I don't lose track of what was done, these three files are included in my git repository and are regularly committed.

All these measures help me control the flow of features into my game. Ever since I've been applying this I haven't implemented new ones - most of what I do right now is improving the user experience. It seems to work well - or at the very least: better. :)


Do you have any ways to conquer your inner lazy demons? Share your story in the comments or hook me up on twitter!
READ: The benefits of getting out of your comfort zone

Sonntag, 19. Februar 2017

Interface design sucks and here is why

You likely came here because you also had that experience: Creating an interface for a client or software, just to proceed to do tedious coding work.

Sometimes that frustration is caused by dull coding: the kind of code you've done a dozen of times before in slightly different configurations. Creating getters and setters, adding listeners to buttons, blah blah blah.
Then again other times, it's simply a lack of knowledge and perhaps communication with the users on how to do things better. 

In other words, UI design (often) both sucks for us programmers, who have to make it and do not like it, and for the users, who have to use the half-assed programs created by demotivated programmers.


Programmers aren't necessarily designers, after all, right?


So how can you make your life a bit easier as a programmer? I've summarized the following tips which I have collected via trial and error and pinches of design experience:


  1. Group together what from a user's view logically belongs together.

  2. Visually separate actions that are functionally different: don't place a delete button right next to an add button.
    The box on the right would make multiple problems. One is: what happens if the user clicked on the remove button instead of add?

  3. Critical actions, like removing data or changing a large set of data, need a higher use-threshold e.g. via a dialog: "Are you sure to do that...?". Those are the kind of actions you don't want to happen if you click on them by accident.

  4. Important actions should be highlighted through movement, form, shape and color. Like this you can control the flow of your user's attention - and where they are likely to click next.

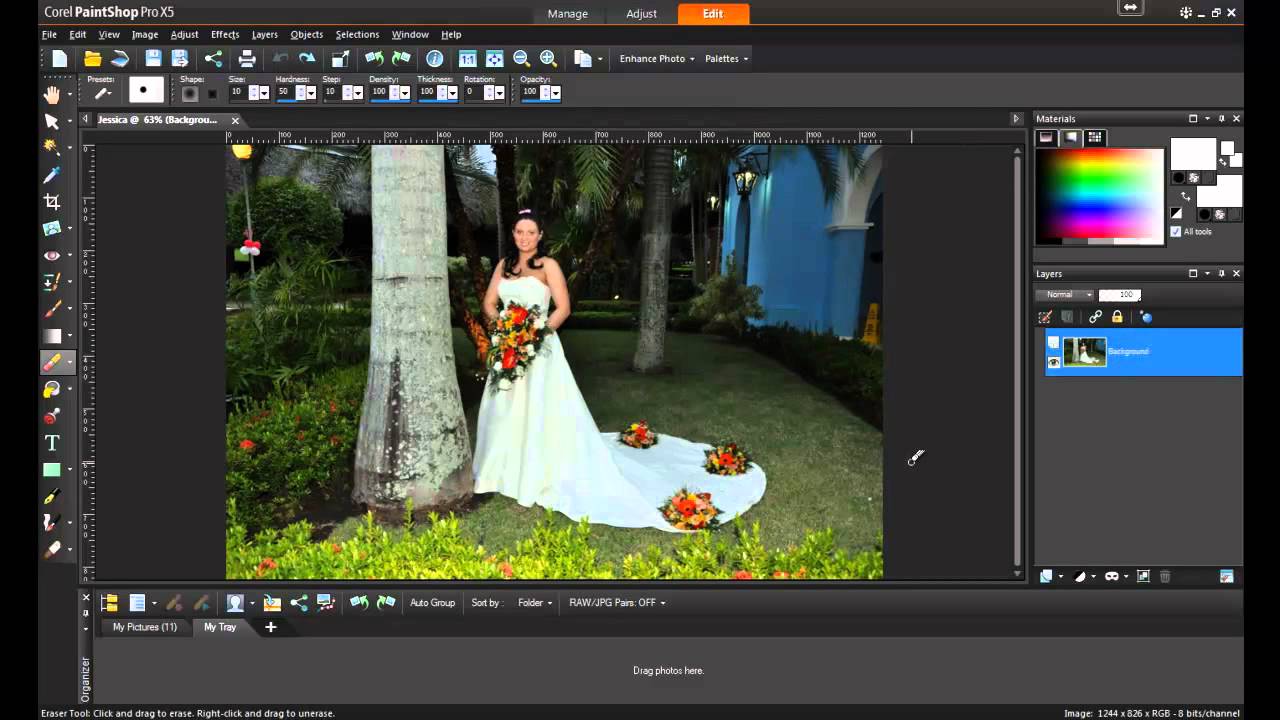
  5. Meaningful usage of icons can increase the intuitiveness of your software - but don't overdo it. PaintShop Pro is basically bloated with them and here they are more confusing than helping.

  6. The look and design of your components should be aesthetically coherent. Think of it like this: In code, you set the rules for your code, how it looks like via style guides and so on. This is in fact very similar to interface design: you can also set a visual rules here and apply them your components: e.g. all interactive components like buttons, menus should be blue, background stays white.

    Read: How to chose a proper color scheme for your interface?

  7. Do not overload your interface with components or buttons. Instead, make information toggleable from display and use meaningful sub-menus, while keeping those sub-menus as accessible as possible, e.g. via shortcuts. Ideally, a single sub-menu should be like a red-black tree with a maximum depth of 3 to 4.

    Menus like this often don't have a depth more than two or three.


  8. The more a user uses a function, button or component in a program, the more accessible it should be. This helps the user's workflow and makes your software easier to use.

  9. Give users the possibility to customize views so they can adapt the software to their special needs and workflow.

  10. Support the users by assistants, in-app hints or tooltip texts.

I hope you found these tips helpful. You are more welcome to add more suggestions in the comments!

Thanks for reading!

Mittwoch, 6. Juli 2016

Creating a Mission System in Java


So... how do you create a Mission System?

I asked myself this question twice so far and recently I came up with the following approach. This system is relatively simple but you can do most of basic missions with it. It consists of a tree with depth 3: Mission, Objectives. Conditions. Each of the components has a mission state, consisting of PENDING, SUCCESS and FAILURE.

First, I will describe the classes needed, which is then followed by their java code at the end of this article.


The general structure is as follows:


Mission:
  • A Mission has a title, a debrief description and a short description. 
  • A Mission has multiple objectives.
  • As general rule, a mission is deemed a success if all its child objectives are deemed successful.

Objective:
  • An Objective has numerous conditions.
  • Objectives have a different behavior per type, described below:

    Default: All objectives must be set to success for a mission to return success.
    Failure: If this objective is failed, the entire mission fails.
    Optional: The objective is effectively ignored by the mission, but can be used to, say, determine a score.
     
  • By default, they are not being updated once a condition was met or failed, but you can change them to run permanent updates.
 
Conditions
  • All conditions must be met for an Objective to be successful. Behavior types (default, failure, optional) do not apply here to keep it simple. To make up for that, I've added the possibility to invert them.
  • Conditions are implemented by you via an interface and an abstract helper class. 
  • For GUI purposes, there's also methods to display the condition as string for the end user.

To use it, you setup your Mission, Objectives and Conditions and call Mission.update() each time you update your game.

Here's the code:


Mission


/**
 *
 * @author B5cully
 */
public class Mission {
  
    public String title;
    public String debrief;
    public String summary;   
    public LinkedList<Objective> objectives = new LinkedList();
    Objective.State state = Objective.State.PENDING;

    public Mission() {
    }
   
    public Mission(String title) {
        this.title = title;
    }

   
    public Objective.State getState() {
        return state;
    }
   
    public void addObjective(Objective obj) {
        objectives.add(obj);
    }
   
    public void start() {
        for( Objective objective : objectives ) {
            objective.start();
        }
    }
   
    public void stop() {
        for( Objective objective : objectives ) {
            objective.stop();
        }
    }

    /**
     * Updates this mission's state
     * @return
     */
    public void update() {
        int i=0;
        boolean success = true;
        boolean failure = false;
        for( Objective objective : objectives ) {
            switch (objective.state) {
                case SUCCESS:
                    if( objective.constant_check ) objective.checkState();
                    break;
                case FAILURE:
                    if( objective.constant_check ) objective.checkState();
                    break;
                case PENDING:
                    objective.checkState();
                    break;
            }
            switch( objective.type ) {
                case NORMAL: {
                    success = i == 0 ? objective.state.equals(Objective.State.SUCCESS) :
                                   success && objective.state.equals(Objective.State.SUCCESS);               
                } break;
                case OPTIONAL: {
                    //ignore the objective
                } break;
                case FAIL: {
                    //only consider fail state
                    failure = failure || objective.state.equals(Objective.State.FAILURE);                       
                } break;
                   
            }
            i++;
        }
        if( success ) {
            state = Objective.State.SUCCESS;
        }
        if( failure ) {
            state = Objective.State.FAILURE;
        }
    }

} 


Objective

/**
 *
 * @author B5cully
 */
public class Objective {
  
    public enum Type{
        /**
         * The objective contributes to success of the mission.
         */
        NORMAL,
        /**
         * The objective counts as fail condition of the mission.+
         * If one objective of this type closes with failure,
         * the entire mission fails. The pending state of
         * FAIL objectives are ignored in the total outcome.
         */
        FAIL,
        /**
         * The objective is optional, it has no effect
         * on the total outcome.
         */
        OPTIONAL;
    }
    public enum State{
        PENDING, SUCCESS, FAILURE;
    }
  
    public String title;
    /**if this is true, the objective is constantly validated. If false,
       the objective is validated once and succeeds permanently once triggered.*/
    public boolean constant_check;
    /***/
    public Type type = Type.NORMAL;
    State state = State.PENDING;
    /**
     * All conditions must be met in order for na objective to
     * succeed.
     */
    LinkedList<ConditionImpl> conditions = new LinkedList<ConditionImpl>();

    public Objective() {
    }
  
    public Objective(String title) {
        this.title = title;
    }
  
    public void addCondition(ConditionImpl condition) {
        conditions.add(condition);
    }
  
    public void start() {
        for( ConditionImpl condition : conditions ) {
            condition.start();
        }
    }
  
    public void stop() {
        for( ConditionImpl condition : conditions ) {
            condition.stop();
        }
    }
  

    @Override
    public String toString() {
        String s = "";
        int i =0;
        for( ConditionImpl condition : conditions ) {
            s += condition.getName() + ": " + condition.getDisplayedText();
            if( i > 0 && i < conditions.size()) s += "\n";
            i++;
        }
        return s;
    }

    public State getState() {
        return state;
    }
  
    public void checkState() {
        boolean success = false;
        int i =0;

        //check the conditions
        for( ConditionImpl condition : conditions ) {
          
            state = condition.getState();
          
            if( !state.equals(State.PENDING) && constant_check) {
                //still update the condition if constant check enabled
                condition.checkState();
            } else
            if( state.equals(State.PENDING) ) {
                //pending: simply update. No updates if failed or succeeded.
                condition.checkState();
            }
            success = i == 0 ? state.equals(Objective.State.SUCCESS) :
                               success && state.equals(Objective.State.SUCCESS);
            switch( state ) {
                case FAILURE: {
                    this.state = State.FAILURE;
                    return;
                }
                default: break;
            }
            i++;
        }
        if( success) this.state = State.SUCCESS;
        else this.state = State.PENDING;
    }
}


Condition 


/**
 *
 * @author B5cully
 */
public interface ConditionImpl {
  

    /**
     * Invoked on condition start.
     */
    public void start();
   
    /**
     * Gets the name of this condition
     * @return
     */
    public String getName();
    /**
     * A Localized, properly formatted display
     * text for this condition.
     * @return
     */
    public String getDisplayedText();
   
    /**
     * @return the state of the condition
     */
    public Objective.State getState();
   
    /**
     * Evaluates the state of this condition. This normally involves
     * calculations.
     */
    public void checkState();
   
    /**
     * Invoked on condition stop (e.g. when
     * it has failed or is being reset)
     */
    public void stop();

}

Here's the helper class for Condition, followed by an example implementation. 


/**
 *
 * @author B5cully
 */
public abstract class Condition implements ConditionImpl {
  
    protected Objective.State state = Objective.State.PENDING;
    protected boolean inverted = false;
    /**
     * The name of this condition.
     */
    protected String name;
    /**
     * A format string to display the condition.
     */
    protected String format_string;
    /**
     * The string returned for display. This is usually
     * name + String.format(format_string, args), where
     * args is relevant info about the condition.
     */
    protected String displayed_text;

    public Condition(String name, String format_string) {
        this.name = name;
        this.format_string = format_string;
    }
   
    @Override
    public String getName() {
        return name;
    }
   
    /**
     * Inverts the result. E.g. Instead of delivering
     * SUCCESS by default, FAILED is being returned.
     * @param inverted
     */
    public void setInverted(boolean inverted) {
        this.inverted = inverted;
    }
   
    @Override
    public void start() {
    }

    @Override
    public Objective.State getState() {
        return state;
    }

    @Override
    public void stop() {
    }
}


/**
 *
 * @author B5cully
 */
public class ConditionKilledEnemies extends Condition{

    LinkedList<Entity> enemies = new LinkedList<Entity>();
    LinkedList<ListenerEntityImpl> listeners = new LinkedList<ListenerEntityImpl>();
    int size = 0;
   
    String current_displayed_text = "";
   
    {
        format_string = "%d/%d";
    }

    public ConditionKilledEnemies() {
        super("Killed", "%d/%d");
    }
   
    public void registerEnemy(Entity enemy) {
        //add enemy to list
        //add a entity listener that tracks the enemy death
        //and adds to the counter here
        ListenerEntityImpl listener = getListener(enemy);
        enemy.addEntityListener( listener);
        enemies.add(enemy);
        listeners.add(listener);
        size++;
        current_displayed_text = String.format(format_string, enemies.size(), size);
    }
   
    public ListenerEntityImpl getListener(Entity enemy) {
        return new ListenerEntityImpl() {

            @Override
            public void onDeath(EntityMobile object) {
                super.onDeath(object);
                int index = enemies.indexOf(object);
                if( index >= 0 ) {
                    enemies.remove(index);
                    listeners.remove(index);
                    current_displayed_text = String.format(format_string, enemies.size(), size);
                }
            }
        };
    }
   
    @Override
    public String getDisplayedText() {
        return current_displayed_text;
    }

    @Override
    public void checkState() {
        //success if the list is empty
        if( enemies.isEmpty() ) state = Objective.State.SUCCESS;
        else state = Objective.State.PENDING;
    }
   
} 

Sonntag, 29. Mai 2016

Game Localization using Java Bundles


I toyed around with two ways how to implement Localization in Java. Let me present you the two ways I've implemented and which are better for you to use. I am assuming you know how to use Java Resource Bundles. If not, the check oracle the tutorial here or check this video I made here. In my examples, I will be using LibGDX, however, the code is almost the same.


The methods have both up and downsides which I'll discuss later.


Using Object Reflection

This method I worked out runs over all fields of one class and translates String types of fields (including fields in superclasses). The value of that field is being used as localization variable. Fields to be translated are marked with an annotation. This is helpful when you don't want to translate every single String in a class, and say, use untranslated Strings for object IDs.

You have a localization annotation like this:

/**
 * Marks a field to be localized.
 * The content of the field is being used to localize it.
 * @author B5cully
 */
@Retention(RetentionPolicy.RUNTIME)
@Target(ElementType.FIELD)
public @interface Localized {
   
}


A very simple class. It's just a marker, after all.

The object is being localized like this:

  
    private static I18NBundle translations= ... // init the the bundle. This is libgdx specific, 
                                             // but works the same with a java resource bundle
                                             // the call may look a bit different
    /**
     * Localizes an object.
     * @param o
     */
    public static void localize(Object o) {
        Class current = o.getClass();
        do{
            try {             
                Field[] fields = current.getDeclaredFields();
                for( Field field : fields ) {

                    //the following is a hack to make the field temporarily accessible
                    boolean accessible = field.isAccessible();
                    field.setAccessible(true);
                    //check if the annotation exist
                    Localized annotation = field.getAnnotation(Localized.class);
                    if( annotation != null ) {

                        //localize the content of the field here
                        String localized = translations.get((String) field.get(o));
                        field.set(o, localized);
                    }
                    field.setAccessible(accessible);
                }
            } catch (SecurityException ex) {
                ex.printStackTrace();
            } catch (IllegalArgumentException ex) {
                Logger.getLogger(Localization.class.getName()).log(Level.SEVERE, null, ex);
            } catch (IllegalAccessException ex) {
                Logger.getLogger(Localization.class.getName()).log(Level.SEVERE, null, ex);
            }
            current = current.getSuperclass();
        } while( current != null );       
    }


An object I want to translate may look like this:

public class CTWindow {

    @Localized
    public String title = "loc_window";

    public String id = "Window001";
}

Using this code, only the title will be translated by the localize() method. However, this may not work as elegantly for switching languages in a live system.


Using Field Names as identifiers

The other method is to use canonical names in your properties file. For example, your property file has an entry like this: com.neutronio.Infantry.hitpoints = Hitpoints. When you translate the field of an object, all you have to do is to get its class and field to obtain the localization.

What sounds nice in theory, isn't as easy in practice. We need multiple methods to achieve this.

    private static I18NBundle translations= ... // init the the bundle. This is libgdx specific, 
                                             // but works the same with a java resource bundle
                                             // the call may look a bit different
    /**
     * Gets the standard file path for a locale. This is required to

     * to turn a path of a properties file into desired format using its tag.
     * @param locale
     * @return
     */
    public static String convertPath( Locale locale) {
        String tag = locale.toLanguageTag().replace('-', '_');
        return tag;              
    }
  
    /**
     * Obtains a localized variable by
     * a simple field name and class.
     * @param field
     * @return
     */
    public static String localizedVar(Field field) {
        if( field == null) return "";
        return field.getDeclaringClass()

                    .getCanonicalName()+"."+field.getName();    
    }
  
    /**
     * Gets a field by name and class. Null if none was found.

     * This method works recursively in all superclasses.
     * @param name
     * @return
     */
    public static Field getField(Class clazz, String name) {
        Exception exception1 = null;
        Exception exception2 = null;
        Class current = clazz;
        Field result = null;
        do{
            try {              
                Field[] fields = current.getDeclaredFields();
                for( Field field : fields ) {
                    boolean accessible = field.isAccessible();
                    field.setAccessible(true);
                    if( Objects.equals(field.getName(), name) ) {
                        result = field;
                        break;
                    }
                    field.setAccessible(accessible);
                }
            } catch (SecurityException ex) {
                ex.printStackTrace();
                exception2 = ex;
                Logger.getLogger(Localization.class.getName()).log(Level.SEVERE,
                        "No acess to Field " + name + " in " +           

                         clazz.getCanonicalName() + ".", ex);
            }
            current = current.getSuperclass();
            if( result != null) break;
        } while( current != null );
        return result;
    }
  
    /**
     * This is the method that ultimately translates the field.

     * Obtains a statically defined localized string.
     */
    public static String getLocale(Class clazz, String name) {
        Field field = getField(clazz, name);
        if( field == null) return name;
        return translations.get(localizedVar(field));
    }


While this sounds like a handy approach there is one huge downside to it: Say my CTWindow class is extended with a MainMenuScreen. So what happens? Due to the nature of this algorithm, I can't define anything like MainMenuScreen.title = Main Menu instead of CTWindow.title= Some Title in my properties file. That means the String in the CTWindow.title local variable is stuck and cannot be redefined by subclasses. That is because of the field.getDeclaringClass() part in localizedVar(). You can work around this if you change the methods by providing the class of the object instead class where the field is being declared, like so:

    /**
     * Obtains a localized variable by
     * a simple field name and class.
     * @param field
     * @return
     */
    public static String localizedVar(Class declaring, Field field) {
         if( field == null) return "";

         if( declaring == null) return "";
         return declaring.getCanonicalName()+"."+field.getName(); 
    }

I haven't tried this out yet, so I cannot say for sure if this works! Let me know if it does. ;)

You also can still use the localize() method ontop of this, as described further above, so both of these methods can be combined together. If combined, they may actually offer the possibility to change language in a live system, as the field names are used directly for translation.

But how do you treat lists or collections of Strings?!

That's a topic for another article!


I hope I brought you closer to the topic of localization. Thanks for reading! I hope you enjoyed it.

Montag, 16. Mai 2016

6 Things that make Your Box2D world freeze

Ever encountered problems with your Box2D setup freezing or locking up and you don't know why?


Yes?

Then read on!

There are quite a few things you can do wrong with Box2D. I have collected a few common mistakes here. These mistakes include...


1) ... Changing the position of a body manually!
Generally, it's a bad idea to modify any body information directly, e.g. by using Body.setTransform() or changing position with Body.getPosition().set(x,y). This makes all contacts currently processed by the simulation invalid and ocreates unpredictable behavior.

Solution: Applying changes to velocity or position (including setting transformation) should always happen after the world has stepped. To do this, you can create a list of operations that is then processed after the world step. This can look a bit like this:
      
   world.step(...);
   if (!operations.isEmpty() )
   {
     operations.perform();
   }

See stackoverflow for more of this issue. You can also try copying the vector to avoid modifying it when using vector math.


2) ... Destroying physic bodies during a callback!
Raycasts and Queues are solved during a timestep. Modifying bodies during that process will cause Box2D to crash. Do not ever do this!

Solution: The code setup in 1) can help you out here. Send your destroy operations to a list containing bodies to be destroyed, where it is processed after the world has stepped. I do this in my game and it works perfectly fine.


3) ... Vectors getting NaN as values!
This happens if you apply an enormous amount of angular or linear impulses to your physic bodies, to the point they get catapulted to nowhere, because they adopt infinite velocity (and thus position).

Solution: Check your formulas and make sure the values are usable! It's a good idea to include a check on whether your values are valid when doing calculations; and throwing an error in case they don't.


4) ... References to destroyed physic bodies!
Once you have destroyed a body, it should not be referenced anywhere again.

Solution: Once destroyed, a body reference should always be set to null!


5) ... Creating physic bodies when the world is in the middle of a time step!
Because if you do, granted, you will get a freeze! This has caused me a lot of headaches personally.

Solution: You can use a similar solution as in 1): creating your objects after the world has stepped by putting them in your operations queue. 


6) ... Creating physic bodies that are created inside other physic bodies!
This causes your created physic bodies to be slung away like a bowl of peanuts gone crazy - if it doesn't crash first! In my experience, this happens when you have shooting mechanics, but the spawned projectiles touch the entity they were shot from.

Solution: There are numerous ways to solve this. You can either make sure your bodies are small enough and far away enough from a defined projectile spawning point - or if collision behavior doesn't matter too much, you can use collision groups and masking to avoid them touching each other.


I hope this helped you with any issues you had! If you still have problems, let me know - I'll be happy to help you out.

Mittwoch, 4. Mai 2016

Guide: How to store data in Java

Imagine creating your own application or game. When you first start out, you may keep and generate your data in code. As you progress you may find how inefficient and cumbersome this turns out to be and perhaps contemplate moving all that to external files.

How do you store the growing amount of application data? What formats do you use to store them?

There are endless methods to store and retrieve data for your project. Before reinventing the wheel by creating your own parser and file format (which is an enormous effort), one must contemplate what requirements your format needs to fulfill.

For example: Does my data need to be...
  • ...flexible and extendable?
  • ...compatible with different versions?
  • ...easily editable?
  • ...easily maintainable?
  • ...as compact as possible?

In Java, multiple ways of storing data for your projects exist. I want to explore some of the technology that exist to do that. A summary can be found below. Click on the format to jump to the details.


Format Syntax Legible Complexity
of saved Data
Extendability Libraries Potential Uses
CSV Simple Yes Plain Changes must be adopted manually none - export or import
data across
programs

.ini Format Simple Yes Tree with depth 1 Changes must be adopted manually ini4j Configuration files
XML Bloated Yes Tree Changes in classes can
be ignored (data won't
become incompatible)
JDOM
JBAX
- Configuration files
- Game data
JSON Clear Yes Tree Changes in classes can
be ignored (data won't
become incompatible)
json-simple - Configuration files
- Game data
Binary None No Tree JDK: Changes in classes may cause saved data to become unusable
Kryo: Changes in classes
can be logged, preserving
compability
JDK,
Kryo
- Networking
- Game data
- Temporary data
- Compressed binary
files

CSV


Comma Separated Values. This is probably the most basic format you can use (it's also one of the oldest, being around before personal computers even existed). CSV files can be easily written programmatically. No additional parsing needed. If you need to keep it as simple as possible (e.g. you only need to store a lot of Strings) you're good with CSV. It has the advantage of being editable with programs like Excel or OpenOffice, which can be very useful tools. However, the second your data uses a tree-like structure (objects in objects) you get dangerously close to creating your own parser, eventually ending up reinventing the wheel. Don't go there ever!
CSV extremely handy for tasks like storing configs or as export format - I've seen it being used for translation files - but other than that... try to stay away from it.

Back to table

Windows .ini file


Before starting I want to point out that this is the only file format I haven't gotten into much detail, but want to mention it regardless.
The .ini file format is a rather ancient remnant of the past, being in use ever since Windows XP and earlier. It strikes out due to its simplicity. Because .ini files allow you to pack your name-value pairs into sections or groups, they can be very handy even to this day. Another plus: you can read them and edit them with any text editor. These kind of files still won't allow you to store an object in an object, but are easier to use than CSV. They make great configuration files - as long as you keep the data you want to store simple. Keep in mind it's likely unsuited to store larger amounts of data. You're welcome to try it out and get the ini4j library implementation for Java.

Back to table

XML


Due to its nature, XML is a format that supports storing of objects in other objects. Its syntax is rather bloated which results in a rather large file size. XML is readable and easily editable, and that is why it is commonly used in a variety of applications, like storing configs and also more complex data itself for games and software alike. It is supported by many frameworks. For this reason, it is also being used to export files across different programs.
When I dove into XML I was using a custom JDOM serializer. That pretty much ended up being a nightmare because I was reinventing the wheel! Since you should probably not do the same mistake, you can use Serializer like JAXB to turn your data into XML files with greater ease.

Back to table
 

JSON


JSON is an acronym for "Javascript Object Notation". It is a readable format that supports complex object trees. Unlike XML it's syntax is compact, so the file size is small in comparison. It also comes with a large support across different platforms and is a very flexible format to store your data in, for configs and complex data alike. This is due to the fact some JSON serializers can be configured to ignore data in the file if it could not be found in the class it is attempting to serialize. If the serializer can't find the object's field in the file, it simply leaves it to the state you declared or initialized it in the class. This makes it a very flexible and pleasant to use format, since it works without making your data itself incompatible. Some game frameworks or engines (like LibGdx) also ship with a JSON Serializer. If you're not working with such a framework, you can use json-simple (version 1.1.1).

Back to table

Binary


Another method to store your data is to simply store it in binary, as 1's and 0's. The upside is, your data won't be readable by anyone (well, partially). The downside is, you always have to call your binary serializer from code to store your data.
When working with Java standard serialization, you will encounter problems deserializing your objects from a file once you've changed the class. The code will terminate telling you the object cannot be serialized (because you changed, added or removed a constructor, methods or field). This can be disastrous if you are recklessly making changes to a class, just to find out you just made hundreds of bytes of binary data incompatible. Good luck redoing all of this!

To avoid this, there are libraries like Kryo that allows you to 1) create customized serializers for each class and 2) add version control for each field you are storing. Point 2) may give you some control over adding compability, but you will be left with unused code fragments you can't remove. If you do remove them, Kryo will kry that an old, deprecated field in your code is missing (excuse the pun). This allows you for some control but is still not as flexible as JSON, I've found.

However, there are some neat things you can do with binary files, for example controlled binary serialization (only store the bits of data you need using your own definition), creating your own compressed data formats, and much much more. One important thing about binary is the fact it's used to transmit data over a network.

Back to table


Summary


The most flexible format I have used for saving large amounts of data that is easy to use and maintain is without doubt JSON, followed by controlled binary serialization (Kryo). With a decent serializer, XML can also be very powerful despite of its large file size and bloated syntax. CSV and .ini are rather simple formats and very handy for simple config files that don't change frequently during development. Which of these formats you will use eventually and for what purpose - you decide!